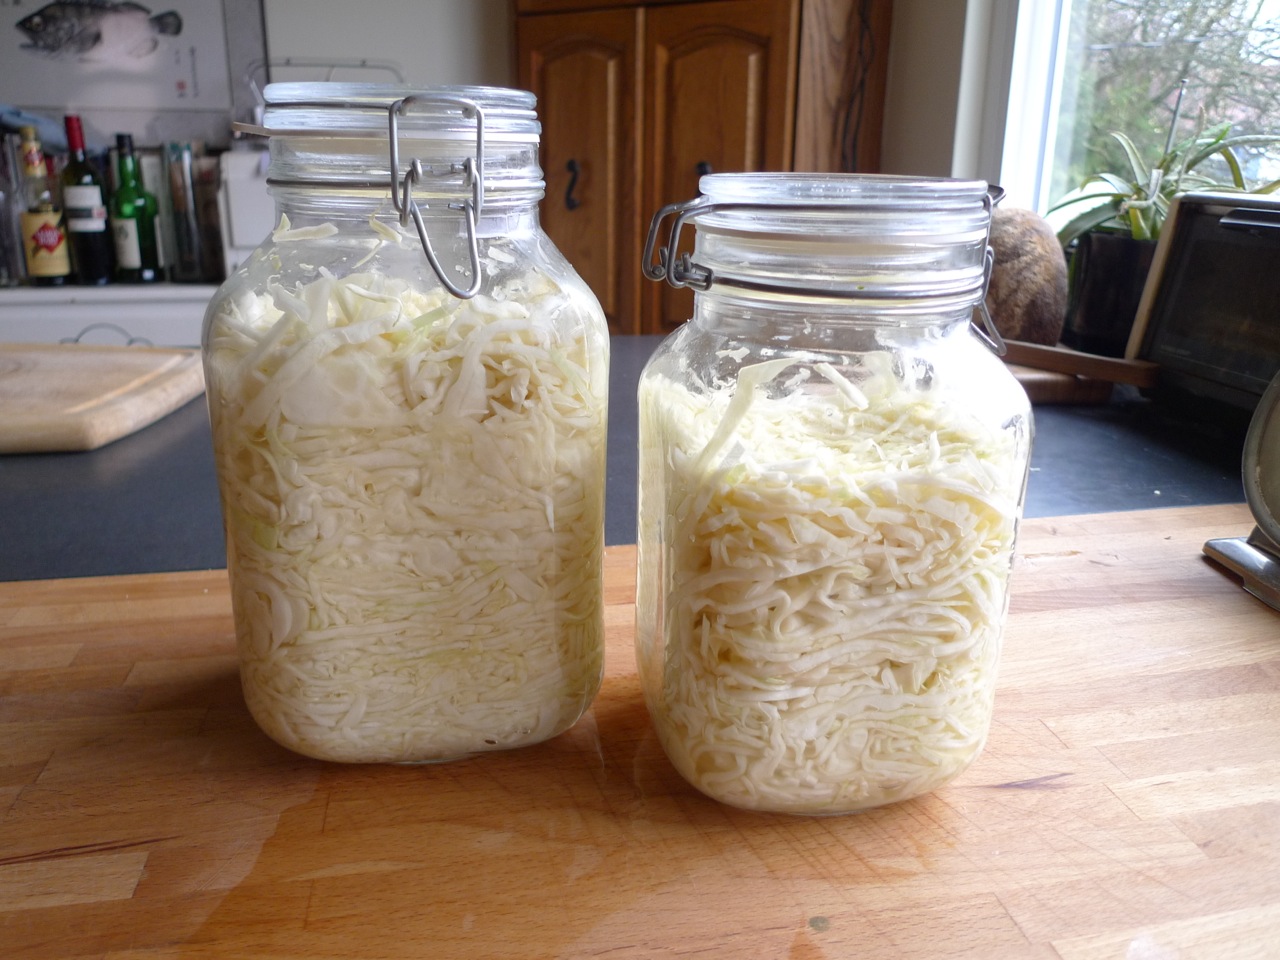
Introduction to Sauerkraut

I made this video as a quick introduction to fermented foods for a community I am in. All hail the mighty Fido Jar!

{ 0 comments }

Pickle Soup

I like dill pickles so much that each year as a child I would find a jar of Polskie Ogorkie weighing down the toe of my Christmas stocking.

Now I make litres and litres of lactofermented dill pickles every summer, picking the cukes while they are small and submerging them in a salt brine with fresh herbs and garlic.

Fido Jars make pickling effortless, and do a wonderful job of keeping pickles and sauerkraut crunchy, but we are now eating pickles from last summer…which means I can make soup from the pickles leftover from the summer before that.

Russia has a pickle soup, but it seems that Poland is the true homeland of Zupa Ogórkowa. Recipes abound online, but I used this one as a base, lifted flavours from a couple of other recipes, and modified to suit our fondness for creamy potato.

Dill Pickle Soup

  • 10 cups of chicken stock
  • ⅓ cup pickle juice
  • 150 gms. (1 ¼ cups) carrots, chopped small
  • 1000 gms. (8 cups) potatoes, cut to the size of game dice
  • 125 gms. (1 cup) celery, thinly sliced
  • 450 gms. (3 cups) dill pickles, coarsely grated
  • 3 tsp. grated garlic
  • pinch or two of dried dill weed
  • 1 ½ tsp. Worcestershire sauce
  • ½ cup milk
  • 2 tbsp. flour
  • 1 egg
  • ⅓ cup sour cream
  • salt and pepper to taste

Boil about half of the potatoes in stock until they are soft, then purée with a stick blender.

Add everything except the milk, flour, egg and sour cream and cook another 15 or so minutes, until the potatoes are just soft.

Stir together the milk and flour, then add a bit of hot broth and stir again. Add to soup and stir well. Bring the soup to a boil and stir until thickened.

Remove soup from heat. Thoroughly beat egg and sour cream together, and slowly add to the soup.

Serve garnished with fresh herbs or a dollop of sour cream.

Makes 12 hearty servings

black and white threshold edited

So that is pickle soup, but I would like to just add a little bit of trivia down here…

We don’t often keep sour cream in our house, so Carmen quickly curdled some milk with lemon juice—one tablespoon of juice and four tablespoons of milk made a thick cream quick.

Using lemon juice or vinegar is a rush job of what would traditionally be called clabbering, or letting dairy be soured…by the same lactofermentation that pickles our cukes or sauerkraut, and for the same reasons—to preserve food without refrigeration.

Lactobacilli produce acid as they eat sugars, and this acid creates an inhospitable environment for pathogens. We can assist our friendly bacteria by creating an environment in which they thrive. Mostly we do this by keeping them a titch warmer than room temperature, and, in the case of fermenting vegetables, by also adding salt.

This acid creates the pucker of pickles and the sour of sour cream.

I first ran across clabbered milk when I was researching the safety of drinking raw milk, and it highlights one of the big compromises we tend to make in our “modern” industrialized society.

Industrialization brought the milk of dozens of dairies together in one big tank, so pathogens from one dairy could infect the whole load. Perhaps because the milk run trains were running in the cool of the morning, the conditions were not hospitable for the protective bacteria which would have soured the milk. So the pathogens took over, and lots of people got sick.

The obvious thing is to abandon industrialization—naturally—and scale back to a convivial life lived in harmony with the natural cycles.

I am sorry. I mean the obvious thing is to cook the milk and kill everything in it—Pasteurization. But Pasteurization kills the lactobacillus as well as the pathogens, so when your milk goes off now it is greenish and foul—not what you want to leaven your pancakes.

Raw milk doesn’t go off, it just transforms into other food products: sour cream, yogourt, buttermilk, and sour milk. You can still make sour milk products from Pasteurized milk, but you have to reinoculate the milk with lactobacillus.

Anyhow. Clabbering is a thing—and it turns out it is a Gaelic word. Read more about it and find the Anglo-Saxon term at Cook’s Info.

{ 5 comments }

A strong and affordable backyard greenhouse

In the rainy fall weather of the Canadian Pacific southwest, plants like tomatoes and cucumbers can easily develop blights and mildews before the fruit is ripe. If you wander the back alleys of the once-Italian neighbourhood of Vancouver’s Commercial Drive, you will see many elderly gardeners shelter their tomatoes with overhangs of plastic sheeting.

But we wanted a full greenhouse to start seedlings in and to hold lettuce through the winter in addition to providing the shelter for heat-loving crops like melon and tomato. I built this greenhouse for under CA$500, and it has withstood many fierce coastal windstorms with ease.

We had made small shelters with PVC pipe, and found the plastic pipe was too brittle. An all-wood frame seemed too finicky and would require extensive joinery or a profusion of gussets. So I decided to frame the house with Electrical Metallic Tubing—EMT—or, plain electrical conduit.

I chose a “house” shape as being an easy shape to make out of conduit—unlike arches with long and consistent curves, the pipes have a simple 45° bend. The peak roof also sheds what little snow we get here on the coast, and has adequate headspace for growing vine crops. I also designed this with an eye to using fairly simple techniques so those with a smaller workshop than I have could still create a sturdy and effective greenhouse.

Our greenhouse is 20′ long, and about 7’4″ wide. We wanted to cover two of our garden rows with a walkway up the middle, but the size is somewhat flexible if your rows are wider or narrower. At this width, our house is almost exactly 9′ high at the peak.

The idea of the greenhouse needing to match the garden row widths could also be seen as an expression of one of my charming manias—sometimes I get an idea in my head and I can’t get it out. In this case, I was interested in Eliot Coleman’s idea of moveable greenhouses, and so I built this so four average people could pick this greenhouse up and carry it to a different spot in the garden.

  • 16 pieces of ¾” EMT, standard 10′ lengths
  • 8 ¾” 90°EMT elbows
  • 15 feet of ⅝” square steel rod
  • 4 lengths of 10′ 2×8
  • 40′ of 1×8 in whatever lengths you like.
  • plywood scraps
  • 50 ¼” x 3″ galvanized carriage bolts, with 50 washers and nuts
  • 3 ten foot long pieces of ½” rebar, cut into thirds.

You will also need 2 10′ 2×6, and eight to ten 8′ 2x6s.

I have used fir to make many outdoor things—rabbit runs, pea trellises, tomato stakes, and this greenhouse. I find that as long as the wood is not buried I get good life without needing expensive cedar or chemical-soaked pressure-treated wood.

I bought plastic greenhouse sheet at our local agricultural supply, but I am sure you can order it online as well. UV in sunlight degrades plastic and reduces the amount of light that passes through the sheeting dramatically. Common hardware store plastic should be replaced after two years, while greenhouse cover will last five.

For tools I used a handsome measuring tape, an impact driver, a circular saw, a speed square, a staple gun and a hand or bench grinder. You also need a drill and a drill press if you have one. Also very nice to have are a chop saw, table saw, and a pneumatic stapler. Almost mandatory to have is a suitably sized EMT bender; I found one for ¾” tubing on Craigslist for $30. You might be able to borrow one, or rent one. You can also find solid curves out in the world—I have bent steel around parking bollards and concrete barriers…but that is definitely slower and more prone to kinking the tubing.

Before we begin, here is one more picture that contributes nothing to this instructional, but shows off how pretty Swedish Red Peas are—with the greenhouse in the background.

Let us begin…

As much as possible, I try to use what I call “reality-based carpentry”—rather than measuring a piece of wood and then using a tape measure to transfer that measurement to another piece of wood, whenever possible just lay the first piece on top of the second piece. This greatly reduces the opportunities to screw up numbers or read things backwards.

Another key concept is the registration face—always measure from the same end. If you measure down one side and back up the other side your errors will compound and you will likely build a trapezoid instead of a rectangle. So pick an end and always measure from that end. For this greenhouse you want to build two mirrored sides—so mirror the damn sides. Lay the 10′ 2x8s down together and mark them Left and Right. Mark the top or the bottoms. If needed, you could lay out your measurements on both boards at the same time, measured from the same end (this is not needed for this project).

Now, rather than trying to measure the diameter of one piece of conduit, lay eight pieces side by side and measure all eight. Subtract that number from 20′, and then divide it by the seven spaces you will have between your eight EMT ribs. You should end up with something like 34″.

34″ felt like a nice space to me. I could have gone with tighter spacing, at the cost of two more lengths of EMT and one more EMT elbow, but this felt fine. I would never go for wider spacing, and if I was in an area that gets heavy snow I would cut that down to 18″ or 24″ between ribs. Check out other greenhouses that have survived good snowfalls in your area.

Cut 14 pieces of 1×8 to that length. These boards are going to be the primary way to make your greenhouse plumb, so make some effort to cut the ends square. A chop saw with a stop block is the ideal tool to make multiple identical pieces, but a carefully wielded speed square will be good enough.

Now start working with one of your 10′ 2x8s. Using one of the ¾” EMT elbows as a spacer, start from your registration end and give one EMT width, then nail or screw one of your 14 1×8 pieces on to the 2×8, aligning them to the top edge. Move your EMT elbow to the end of that piece and butt another piece of 1×8 onto it. Repeat.

Because I have seven spaces between eight ribs, the join between my two 10′ 2x8s falls in the middle of a space. This is great, because a 1×8 piece will span the joint. So, space with your EMT elbow, butt up the 1×8, and screw the first half on. Then slide your next 2×8 underneath and line it up. Make an effort to get a straight top edge along the length of the new 20′ board. You could even stretch a string or a chalkline to ensure your eyes do not deceive you.

Keep screwing or nailing 1×8 pieces on, always spaced with a real piece of EMT, not a tape measure. When you get to the last piece, make sure your last piece of EMT will line up with the end of your 2×8. If it hangs over, trim your 1×8 a little. If against all odds it is too short, then trim your 2×8 a smidgen.

Now you have two long and heavy pieces of wood joined together by short and thin piece of 1×8, which is suboptimal. Gently roll it over and tack on another piece of wood. 1×8 would be okay, but I would suggest you use a scrap of plywood about 7″ by 30 inches and ⅝” or ¾” thick.

Now drill eight ¼”+ holes through the whole sandwich, four on each side of the join. Stay 3″ back from the ends of the wood to avoid splitting. Putting the domed head of carriage bolts on the outside (the 1×8 side), wrench them up tight.

This photo shows one of the notches that will hold an EMT rib.

You should now have a good, strong 20′ long base for one side of your greenhouse. Repeat for the other side, starting from the registration face.

Tangent: As you can sort of see in the pictures, I did this in a slightly different way. I started with 2 12′ and 2 10′ 2x8s and cut a long lap joint. This allowed me to geek out a bit, and also avoid having the plywood scab on the inside. You can see the lap cutting technique between 3:30 and 4:40 in this video.

Leaving these aside, it is time to make the EMT ribs.

I chose to use one 10′ length of EMT for each wall, joined at the peak by a 90° elbow. Elbows are expensive, so I could have chosen to bend the peak myself, but I knew it would be hard to get consistently matching parts when I had to make three bends in one piece of tube. By using the prefabricated elbow, I only need to put one bend in each wall tube. Besides, the elbows are sexy.

You might want to buy yourself an extra piece of EMT for practicing bends. And on that note…I called around and got a shocking range of prices, from about $10 per length of EMT at Home Depot to $3 at an electrical wholesaler. Surprisingly, even at wholesalers there was a range from $3 to $6—twice the price. . I ended up going to two wholesalers to get the best price on elbows at one place and lengths at another.

Now you need to figure out where to bend your walls into the roof. I started this process on graph paper, but then again moved to a full-scale layout. Lay lengths of tube down on the ground. Position your elbow at the peak. Move things back and forth until it seems like things are about right, and don’t rush.

I didn’t want to cut my 10′ lengths—for no other reason than laziness and an aversion to adding another opportunity to make things different lengths. This worked out great with the added length from the elbow and the two-row width we were after. This put the centre of my 45° bend, where the wall becomes the roof, at about 66″.

All of my wall tubes, with the longer wall leg to the right and the roof leg to the left.

Now, I say the centre of the bend, and I am afraid I have bad news.

When you bend metal, it does not turn a 90° corner making a perfect right angle. As the metal bends, it is offset by an amount that relates to the bending tool and also the thickness of the material. This is the bend allowance, the K Factor, or the “takeup”.

So… Have fun!

As I said, go ahead and splurge on an extra length of tubing and practice bending it. Make a mark, line up your bender on the mark, and see what happens. Where does the bend start and where does it end? How much length is taken up in the bend?

Lay your sample back down on your full-scale mock up of pipes and string and whatever, and see how things look.

Once you are happy enough, mark and bend all the tubes. Did I mention reference faces?

You can bend tubing around other things. You would need something about one foot in diameter and very solid. Maybe a tree trunk? But a conduit bender will make it easier to get matching bends and greatly reduces the risk of kinking, so I am going to assume you have begged, borrowed or stolen one.

Now here is a cute trick. My bend was at about 66″ or maybe a little more—so after the bend I had a long leg and a short leg. I laid the long leg on a table with the short leg hanging off, and let gravity plumb my pieces. Now lay your next piece beside it and you will be able to easily see how closely the angle matches.

Reference faces! Pick a tube and make it the master pattern. Adjust all the others to match the master.

Now, while you have all your tubes lying on the table with the short leg hanging off the edge and gravity pulling them all plumb, we will mark drill holes so you can bolt the tubes onto the base boards you made. You don’t want those holes going all willy-nilly.

First measure up from the end of the long leg—I am saying long leg, but that is just for my geometry. What I mean is the end of the tubing that will be touching the ground. Make a mark across each tube at 1 ¼” and 6 ¼” so the holes will land nicely within your 2×8.

With the short leg hanging off the edge, the high point of tubing on the long leg is the centre. Turn your two marks into crosses at the high point. These are your drill spots.

Once I had the spots marked I actually used the same cute trick on my drill press. I set up a support a few feet away so the long leg would be level, and the short leg would hang straight down. This made my drill holes go straight across the centre of the tubing.

If you don’t have a drill press, use a centre-punch to help your bit start, drill a small pilot hole and work your way up to slightly oversized hole for your ¼” bolts. Drill two holes in each rib.

Okay, this next part was my least favourite.

EMT is normally connected with an external clamp the tubing slides inside, tightened with screws. But using these would be bulky and would create unacceptable wear points for the plastic covering. So I researched the inside diameter of the EMT tubing, and found the diagonal measurement of the ⅝” square rod is about the same.

My idea was that I would just grind off a smidgen of the corners and hammer lengths of the rod inside the EMT. This way there would be no clamps but the joint would be reinforced with a long piece of rod.

Great in theory. It turned out that I had to grind a lot, which I tried to compensate for by brute force hammering. Once I finished, I was very pleased with the result, but I was very sweaty and unhappy in the process.

So at least you know that is coming. Take a bit of EMT to your metal supplier and see if you can find something closer in size than I found. This problem is created because the EMT is plus or minus the nominal size, as is the square rod. Perhaps I ended up with EMT on the small side and rod on the large side so the tolerances compounded unpleasantly.

There is also quite a difference in shape between hot-rolled steel and cold-rolled, so check out different materials—I wish you best of luck with that.

Once you have picked your materials, I think it would be a good idea to grind the corners off while the rod is full-length, or maybe cut in half. That just makes it easier to clamp down for safe grinding.

Then use a zip blade in your hand grinder and cut the ⅝” square rod into 16 pieces; they should be around 7″ long.

Using various hammers and rubber or wooden mallets, bash the rod into the EMT wall pieces, and then into an elbow for the peak. For me, I ended up with noodley ribs that are now shaped like a peak house. Keep going until you have ground all the rod and bashed all the ribs together.

I came up with this method to avoid abrading the plastic, but this is by far the worst part of building the greenhouse. If anybody else has found a better approach, I would love to hear it.

Okay. Set one of your base boards roughly where you want it. Slot one of your ribs into the EMT-width space in the board, eyeball it square, and clamp it in place—don’t start with the end ribs. Drill holes through the wood and run carriage bolts through, again with the domed side out where the plastic will lie. A helper to hold the noodley ribs would be quite nice at this stage.

Bring your other base board into roughly the correct position, clamp on the EMT, drill and bolt. Don’t worry about wrenching them too tight at this point. Continue to fit all the ribs.

Adjust the spacing between the base boards so the walls are vertical and cut two 2x4s to that length. Use long screws and toenail these boards across the ends, aligned with the bottom of the 2x8s. This makes a small sill you have to step/trip over, but it is not too bad.

You now have a base wooden rectangle with eight metal ribs—it should look something kind of like a greenhouse. Congratulations! Square it up.

At this stage the ribs were still kind of noodley, as the rods could twist inside the elbows and the wall pieces; so let’s take that noodle out.

I used six 8′ 2×2 to make braces/spaces/hanging poles for the plants. Lay one of your brace boards down on your base board and mark where the ribs actually are. This is important because the ribs can be quite noodley up in the air thanks to the top elbow joints. When you mark the where your ribs are at the bottom you ensure they will stay at the spacing at the top.

Again, we will mirror them, so clamp two braces together, and use a 1″ hole saw or spade bit to drill both pieces at the same time. When you unclamp, you have a half-hole that nicely fits over a rib.

Important! The end rib is going to be infilled with 2×2! You want your brace to be 1 ½” shorter than your base board on each end, so it will butt into the end wall.

Use 1 ½” self-tapping screws to attach the brace to the ribs. If you use six brace pieces as I did, attach one at each end, then span the gap in the middle with the third. Or use two 10′ pieces and scab them together with plywood. I attached my braces so they would be aligned with the centre of my beds. Eyeball the spot, then measure or snap a chalkline to keep it consistent.

In a snowy climate, a ridge pole would be a real good idea. I didn’t think it was necessary for the coast where our snow usually comes in liquid form.

After the top braces are on to space out the ribs, wrench up the bolts at the bottom. Check your base rectangle for square again, then attach diagonal braces to the walls to buttress against the wind. I did not cut notches in the wood for these, just countersunk deep enough to give my self-tapping screws enough length to bite into the conduit and screwed them on.

Now figure out the end walls. Attach 2×2 to the EMT with self-tapping screws. Custom fit in whatever way makes sense, remembering you need a door at one end and an opening window at the other. I think my window should be larger, as it really gets hot in this house.

As you are going, glue and staple ⅜”-ish plywood gussets on to attach all the 2x2s together, to the baseboard, to the 2x4s on the end, and to the top braces. I bought a narrow crown stapler at a price that almost makes it disposable, and I am very pleased that I did. Staples are fantastic for attaching gussets like this, or for building things with chipboard or plywood. You could use screws to hold the gussets until the glue sets, but I would try to borrow or rent a stapler if you can’t find a cheap one.

It is time for a final positioning and squaring to get your greenhouse right where you want it. Then, pound in four pieces of rebar inside each baseboard. I drove them in at opposing 30° angles—the idea is to make it hard for the wind to pick up your greenhouse and blow it away. Pound three 3″ framing nails beside the rod and bend the last bit of the nail over the rebar so the greenhouse is well pinned to the ground.

And when that is all done, you can stretch the plastic—this step really calls for an assistant or two. The professionals use a cool system called wiggle wire that locks the plastic in a channel. It is removable and adjustable and even lets you attach shade cloth as needed, but it is quite pricey. I simply stapled the plastic taut onto a ½” thick lathe and rolled the wood up inside the film a couple of turns, then screwed through the whole thing to attach to the base boards. Make sure you roll to the inside so all the rain sheeting down your greenhouse does not end up rotting your lathe prematurely.

Before you stretch the top cover over onto the end walls, sheet the end walls. I ripped long lathes about 3/16″ thick and stapled through them to hold the plastic sheeting on. Then do the same for one end of the top cover, and, pulling tight!, the other end. This is thirsty work.

Futz around with doors, windows and automatic openers, and you have yourself a fine little greenhouse.

{ 4 comments }

Tips for making (firm) yogourt.

Yogourt is a traditional way of preserving milk and enhancing nutrition–and by making it I have avoided also making a literal wall of empty plastic yogourt containers. I have been making yogourt for many years now, and I think I finally understand it well enough to be able to laugh at my mistakes. So this is going to be a pile of trivia, some links, some science, and a summary of my current method.

How about we laugh first? Or skip straight to the instructions if you like.

Back in the day, I could not get my yogourt to be as firm as I would like so I started adding powdered milk. By increasing the milk solids, I did get firmer yogourt.

This is stretching my memory of the chain of events, but I think I then had the bright idea that I could make yogourt entirely from powdered milk, which would allow me to buy a bulk sack of dried milk and save money.

I also used to not pasteurize my milk, reasoning the bottling plant or the drying plant had already done that. This saved me a lot of electricity, and also eliminated the fussiest parts of yogourt-making, getting the right temperature at each step. Knowing what I do about food poisoning in the industrial food system, I am horrified I published this and I dearly hope nobody died after following my instructions.

But I understand fermentation a lot better now, google has more stuff in it, and also, we saw Sandor Katz speak.

Firm yogourt

Heat the milk up, and hold it at temperature for a period of time.

After years of googling and silliness with powdered milk I finally came across a paper on industrial yogourt production that talked about denaturing whey proteins by heating the milk to a temperature and holding it for a set time. Hotter is a shorter time, and cooler is a longer time. 

“The temperature/time combinations for the batch heat treatments that are commonly used in the yogurt industry include 85°C for 30 min or 90-95°C for 5 min”

This step may be adequately met in the traditional scalding stage, which may be why many people make good yogourt without knowing this info–whereas my newfangled low-temperature-powdered-milk yogourt was never very firm.

Here is a very readable article which has an interesting temperature method. They mention the scientists Lee and Lucey, which, if you google them, you will find a ton of papers on yogourt science, including the quote about temperature above.

If you want thick Greek-style yogourt, you can leave the yogourt in a fine mesh strainer so some of the whey drips out.

Reusing yogourt as a starter

The next mystery of yogourt is that when you make a batch using grocery store yogourt as the starter, it always seems to poop out after about a half dozen lifecycles. We saw Sandor Katz, Fermenting Guru, speak, and he said that is simply a consequence of commercial cultures.

And when you think of it, of course that makes sense. Our ancestors in yogourt-eating societies did not have labs and sterile workspaces to replicate and freeze-dry cultures. So either it was being refreshed from the environment, or the culture itself did not weaken after a few lifecycles. Katz says the latter. Some heritage cultures reproduce indefinitely, and some have additional properties favoured by different cultures, like the challengingly-textured Finnish Viili, or “ropy yogourt”.

I find I usually go out of town, or clean out the yogourt jar and eat my starter, or have some other life event interrupt me before my starter loses performance so I like to keep a few pouches of Yogourmet around. Yogourmet is a common starter culture available in better health food stores, often in the refrigeration section. I would expect you would find it in “ethnic” stores as well, like Greek, and maybe Indian. It comes in a box with several pouches of freeze-dried culture.

Heating tips

The basic rule is to heat milk slowly and cool it quickly. This prevents burnt flavours, and reduces the chances of pathogens infecting the milk as it cools. At this stage, milk is warm, wet, and full of protein, so it is a bacterial playground. Ice or cool baths might be used in cheesemaking, but for yogourt I just wait until it has cooled down naturally. The milk will be inoculated with billions of acid-producing bacteria that create an inhospitable environment for spoilage causing bacteria.

I have fermented yogourt in all sorts of ways. I have a giant Korean cooking thermos–a thermal cooker–which does a great job, I have wrapped blankets around pots, I have tried a crockpot, I have made a giant bain-marie, some people use a sous-vide. I had a two litre electric yogourt maker–the multiple tiny pots do not suit our eating style–and it worked great until it died.

But the best by far is our current house, which has an old gas stove with a pilot light.  It holds a wonderful incubating temperature inside the oven, so after I have inoculated the milk, I just put the pot inside the oven and walk away.

Lastly, here is an amazingly useful tool for making yogourt and cheese. This thermometer’s alarm will sound for both High and Low temperature settings, so it will tell you when your milk is hot enough, and then it will tell you when your milk has cooled enough for inoculation. This just saves a ton of fussing and allows me to do other things without boiling over or forgetting milk until it is too cold.

How to make (firm) yogourt

I typically make two litres of yogourt at a time, as it keeps nicely.

Over low to medium heat, warm milk to 95°Celsius (205°F) and hold it there for five minutes.

Let the milk cool to 45°C (115°F), then inoculate it with a starter. For starter, use one pouch of Yogourmet or a couple of teaspoons of yogourt per litre of milk, and whisk thoroughly or blend with a stick blender. If you are using a heritage culture, experiment.

Incubate the inoculated milk in stainless steel or glass container at 45°C for four hours. Incubating yogourt for a longer time makes it more acid, not more firm. I like sharp yogourt, so I often make my yogourt at night and take it out of the warm oven in the morning.

Congratulations! You have made yogourt–just chill and enjoy. I use it most in smoothies, and as a sour cream substitute for perogies. I love to drink Lassi, with cardomom and rosewater. And labneh is seriously easy and wondrously delicious.

{ 5 comments }

The Life and Death of Bun-bun.

There has been some heartfelt times around the urban homestead recently. Our doe rabbit Apple had stopped producing reliable litters of kits, and so for the first time we put one of our breeding rabbits on the dinner table.

I have some precedents in my childhood, particularly when Abby the Goat finally got too old. Abby was a great goat, a good mother, a productive milker, and a lovely person to be around. She was so old, by the time my family killed her, that she was sure to be tough as an old boot, and so we turned every bit of her into Ground Goat. Many the dinner of spaghetti and meat sauce came with a fond remembrance of Abby and a story of living with her.

So, I have some precedent, but I had never killed one of my own breeding animals.

Killing Apple was hard.

We tried a new kill method and that was excellent so Apple truly died as peacefully as you could imagine, literally with a mouthful of clover.

To fill Apple’s spot we bought Lucia, a piebald doe—what the rabbit breeders call a broken colouration.

Lucia came bred, which is maybe good or maybe bad because we still don’t know if our buck Apollo is part of the problem. Lucia is not so used to human contact and charges quite a bit. But she has quickly learned that the green deliciousness we bring is not to be feared.

And then Lucia kindled—a litter of one small kit.

So it begins.

I guess someone who “produces” rabbits would have other litters they could introduce little Bun-bun to, so it would be warmed by the cuddle puddle of cuteness.

Or perhaps someone who produces rabbits would have just snapped Bun-bun’s neck and tossed it on the shit that accumulates under the cages in a production barn.

Carmen brought Bun-bun in at night, and tucked it in a nest of Lucia’s belly hair and straw, so it would survive the chill. In the morning, she took it outside to nurse.

I say it because after several days of this, Bun-bun died, and we never sexed it to know if it was male or female.

We tried to keep it alive, knowing a single kit would usually die. Next time we will try something else.


Bun-bun’s death occasions a lot of thought.

There was only one end for Bun-bun, and that was an untimely demise—though untimely is difficult to define, since in the wild Bun-bun may have died at birth or within days. Rabbits have many kits for a reason. If Bun-bun matured enough to venture outside the den there are eagles and hawks, dogs and cats. Foxes? Weasels? Mink? I don’t know. But like I say, rabbits have many kits for a reason.

On our homestead, Bun-bun would have spent four months being moved to fresh grass every day. It would have snacked on blackberry canes and carrot tops, as well as any dandelions we pulled from the garden. Bun-bun would have torn around on those powerful and delicious hind legs, frolicking in sunshine and reclining in rain—droplets beading on its fur.

Would it grow to be piebald like Lucia?

Anyhow. Four months, and then we would have put Bun-bun in our stew pot, probably in the Portuguese style. We would have scraped Bun-bun’s hide and tanned it to gift, or to work into something lovely.

Should I be sad? I am. As Stephen Jenkinson says, “You don’t have to like death, but you do have to befriend it.” I never like it, and I am tearing up and congesting as I read over these words.

Bun-bun would die regardless—by hypothermia or predator or the stew pot or just old age. But I am sad that Bun-bun never knew the taste of fresh clover, or the warmth of sunshine or the joy of leaping.

So, Bun-bun got a tiny shroud of organic cotton. I dug Bun-bun a grave many times deeper than its little body, and laid it carefully on soft sand. Carmen poured it a final meal of milk and sang laments in her ancestor’s language for its short life. I filled the grave in, taking care to pack the soil so Bun-bun would not be dishonoured with soil sinking in an unseemly way. And then we laid rocks in a careful pattern, with big rocks at the cardinal directions and one particular rock in the middle which was just about the same size as Bun-bun itself, though much heavier than that poor, cold little body.

black and white threshold edited

Addendum:

I wrote this post a few months ago, and in our rabbitry some things have changed and some have remained the same.

After Bun-bun died we mated Lucia and Apollo and Lucia bore a litter of six lovely kits. These kits are practically a high-school genetics class, showing the combinations of their black father and piebald mother—one black, one white, three piebald…and one very beautiful light silver.

A couple of weeks after their birth, I found this gorgeous silver bunny dead and stiff out in the run.

So a little more about rabbits…

A few weeks after breeding, we give our doe a nest box and a pile of straw. As she gets close to kindling she begins tearing around with mouthfuls of straw, like a comical moustache. She builds a straw burrow in the box, and as she gets very close to kindling, she pulls the softest hairs from her belly to line the nest. Born blind and hairless but for a light down, this nest keeps the litter warm until they can walk.

The doe will jump into the nest box once or twice a day to nurse the kits. Unfortunately, sometimes a kit will stay latched on the doe’s nipple when she jumps out. Rabbits do not have the instinct to pick the kit up and put it back, so if the kit is too young to find its own way back, it will likely die.

As did this fine silver kit, carried away from the warmth of its litter mates.

As fate would have it, I found it after the Trick or Treaters had all gone home on Hallowe’en.

We were tired, but it was obvious to me that there was no better time to return this little kit to the soil than when the veil between worlds is at its thinnest. So I dug another deep grave near the ash Carmen calls her Grandmother Tree. We wrapped the kit in a clean square of organic cotton from an old sheet that has now provided the shroud for several animals. We sang and drank whiskey.

And then, out of the darkness—Christmas Carols.

I guess a group of people had costumed themselves as carollers, and were singing for their candy. It was eerie and wonderful and hair-raising; I feel quite sure that little silver one was carried safely across.

So, there has been more tears than tastiness in our back yard, but that is how it sometimes must be. I have written a bit about this before, and I frequently struggle to put my feelings into words.

I think if we would like to be “sustainable”, if we would like to find our harmonious place in the order of things, we need to spend a lot more time intimate with the life and death of our kin, both human, and more than human. Raising rabbits is not our dominant source of protein, and it likely costs more in feed than it contributes to the grocery budget. But it very much makes me human.


{ 10 comments }